First Steps
Everything you should do after signing up to get the most out of Market Trak from day one.
You have signed up, verified your email, and landed on your dashboard. Here is a quick walkthrough of everything you should set up so Market Trak is ready to work for you.
Tick these off in order and you will be fully set up in under 15 minutes.
1. Complete the welcome flow
When you first sign in, Market Trak walks you through a short full-screen welcome experience: paste your agency website, review the logo and brand colour we pulled from it, and generate your first branded Content pack. By the time you reach the dashboard, your workspace is already set up and you have your first report and three social posts ready to use.
See Your First Welcome Flow for a detailed walkthrough.
2. Enable notifications
You will see a notification prompt on your dashboard.
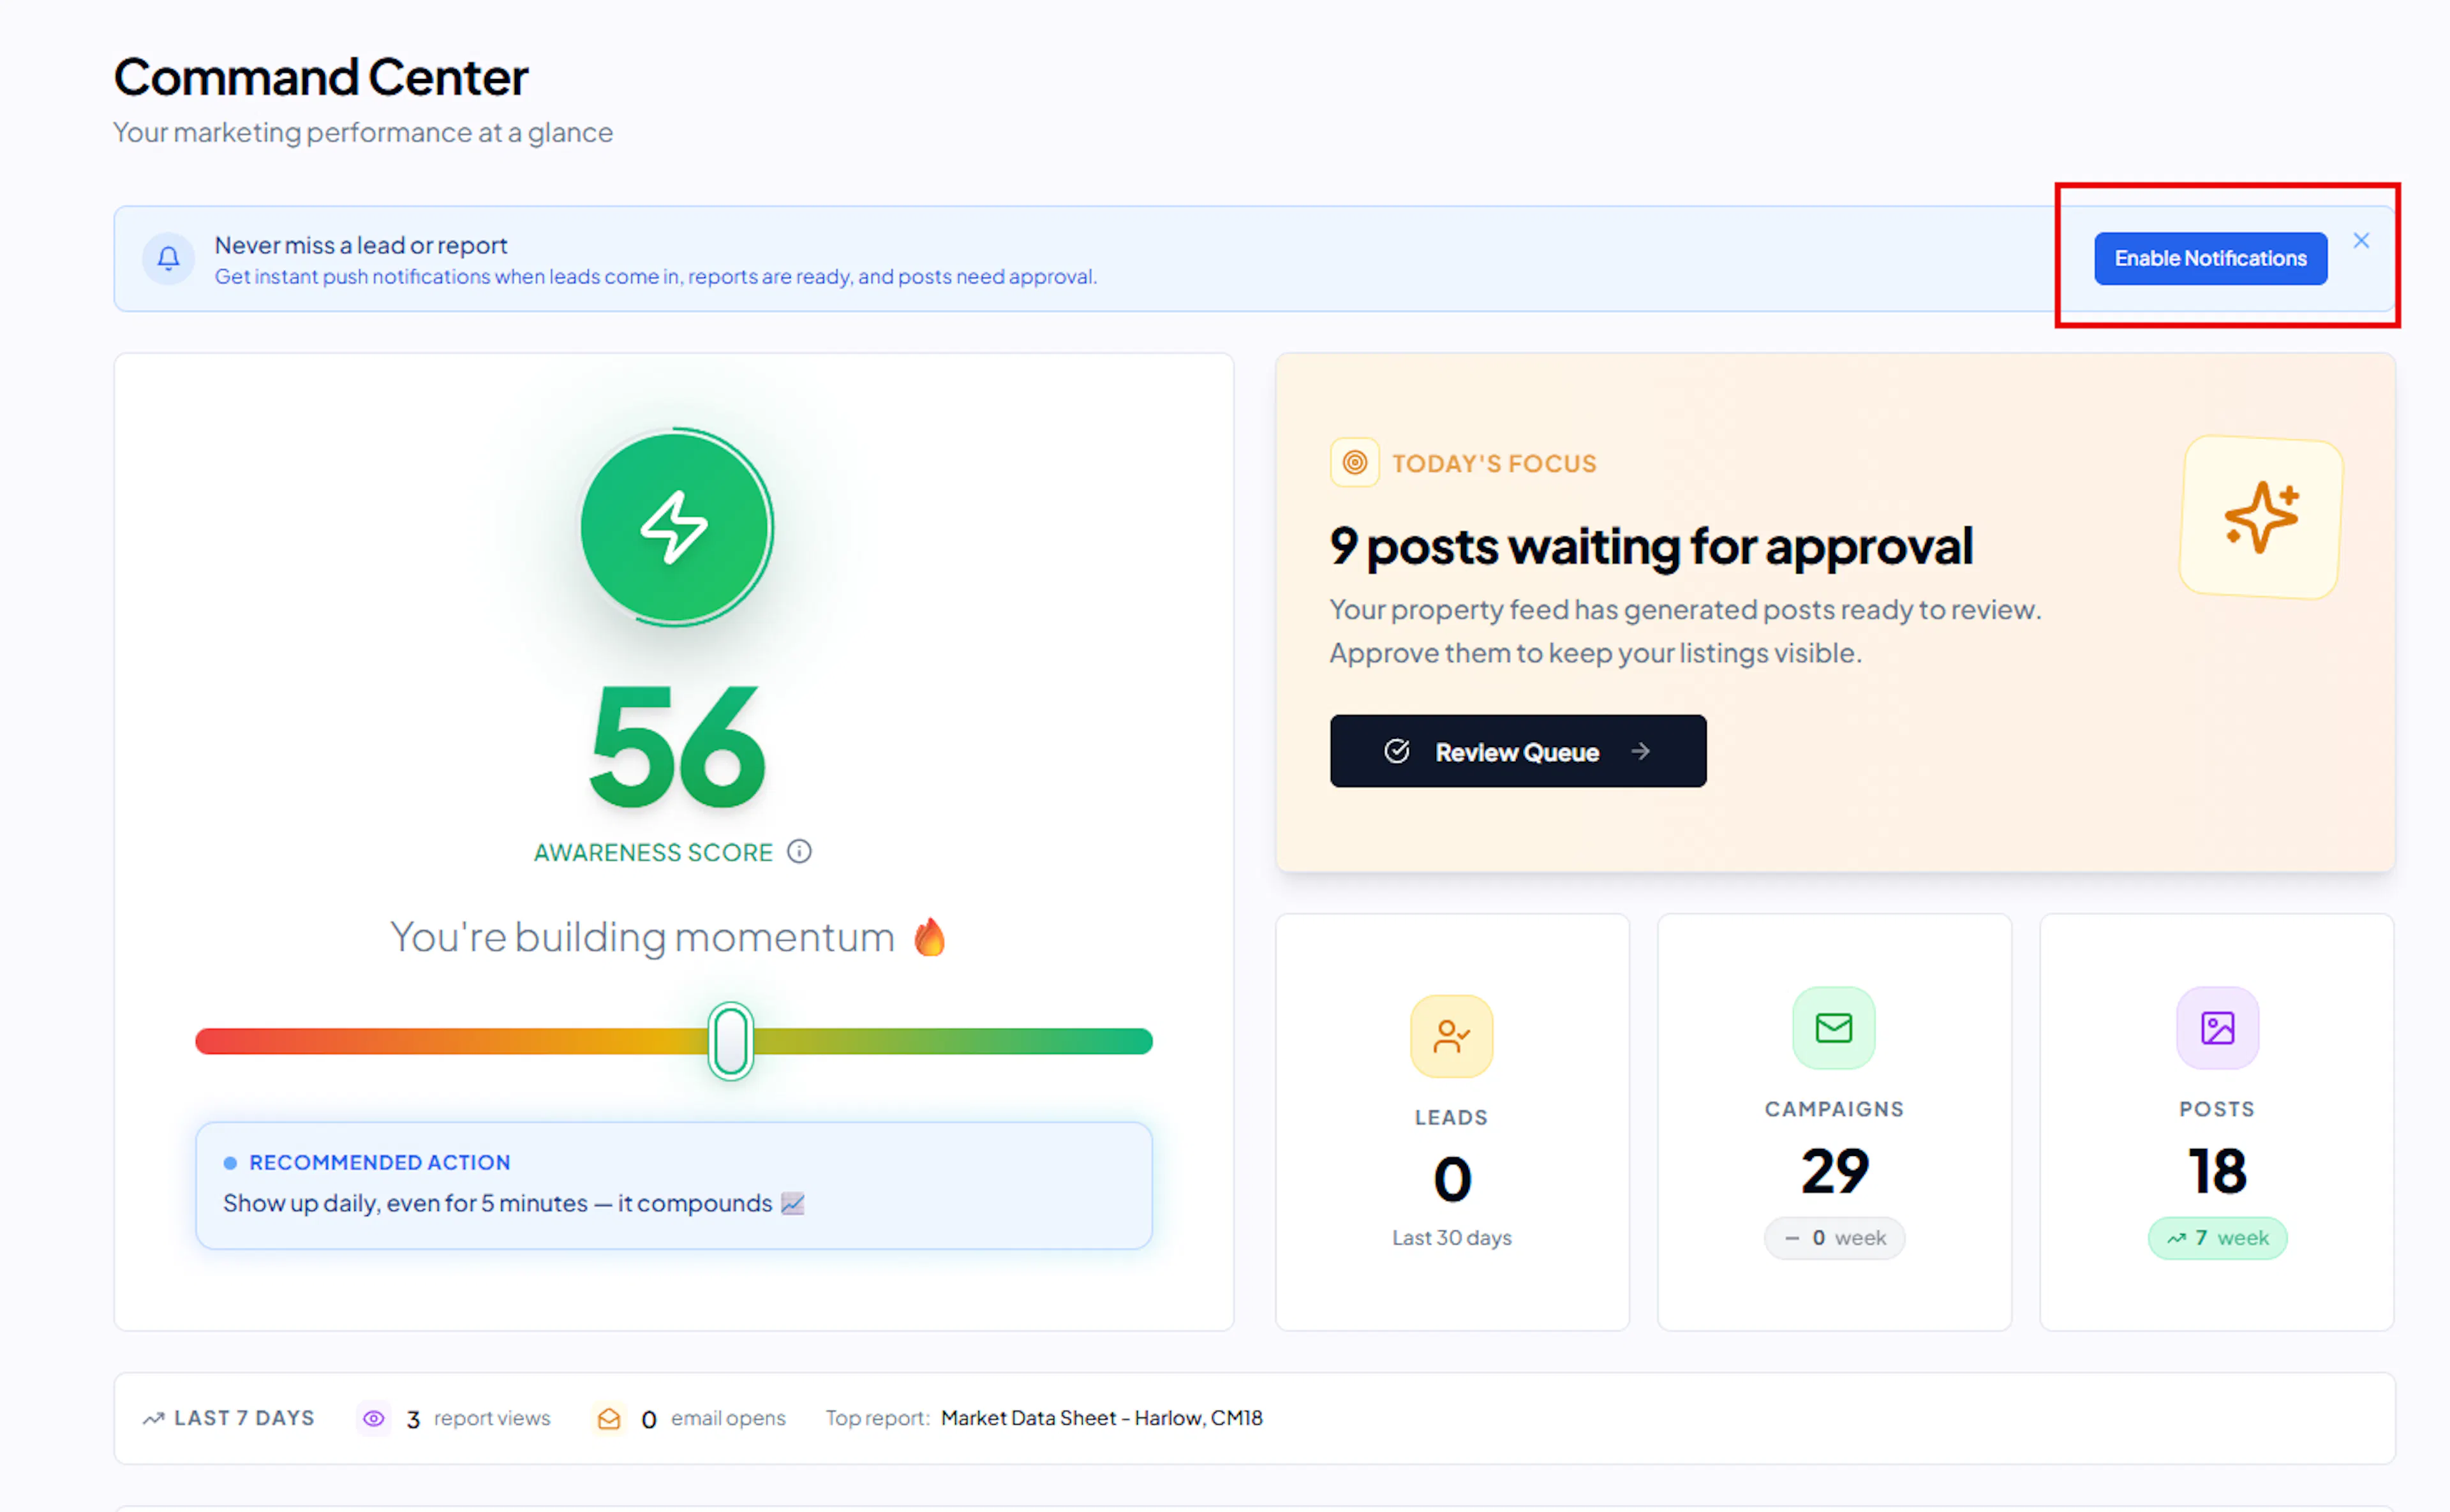
Click Enable to turn on browser push notifications so you get real-time alerts when:
-
A new lead comes in
-
A report finishes generating
-
A scheduled post is published
-
Your credit balance is running low
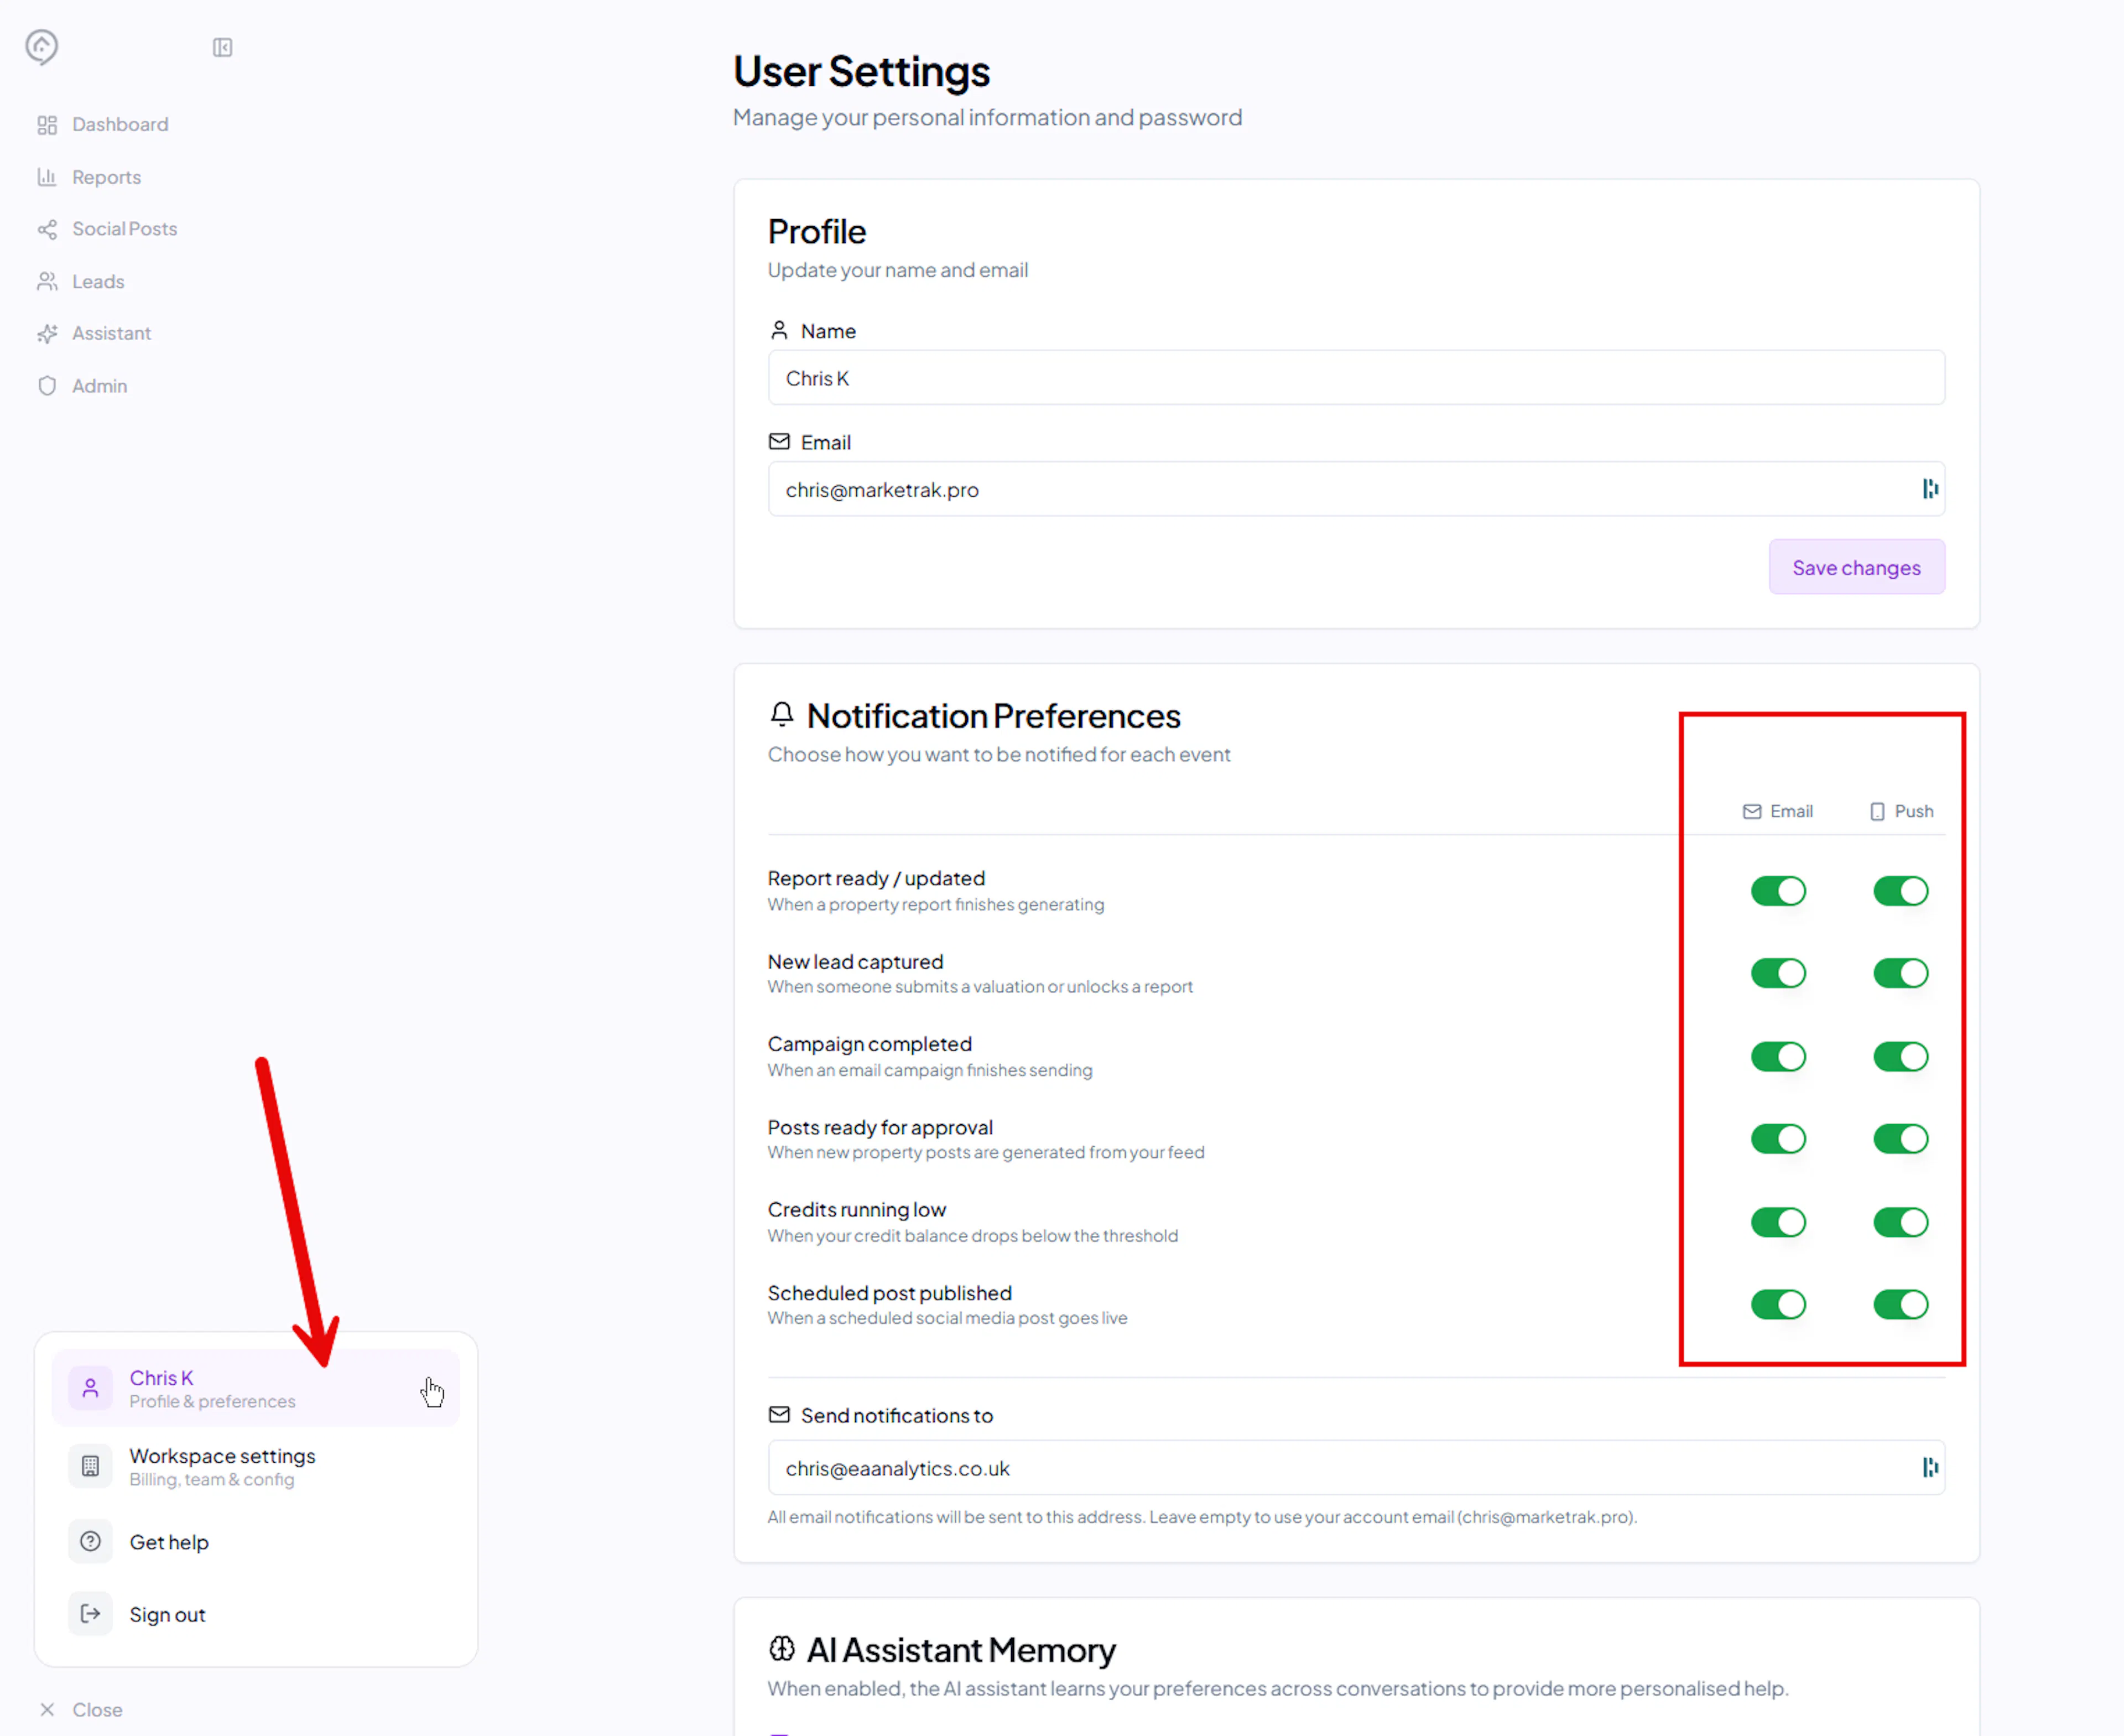
You can fine-tune exactly which notifications you receive (and whether you want email, push, or both) in your User Settings under Notification preferences.
3. Set up your workspace
Your workspace is your agency's home in Market Trak. Head to Workspace Settings (click your profile icon in the sidebar) and configure:
-
Workspace name - your company name as you want it displayed
-
Logos - upload your dark logo (for light backgrounds) and light logo (for dark backgrounds)
-
Brand colour - set your primary colour so reports, emails, and buttons match your branding
-
Calendar booking link - add your Calendly or valuation booking page URL. This appears on your reports and instant valuation page
For the full details, see Workspace Setup.
4. Add your privacy policy URL
Add your privacy policy link now. You will find a single Privacy Policy URL field in Workspace Settings > Tracking & Analytics. The same URL is used on the cookie consent banner and on every lead capture form (report unlock, instant valuation, embed signup, email signup), so you only need to set it once. See Tracking & Analytics.
This helps you stay GDPR-compliant from the start.
5. Connect your Facebook page
Connecting Facebook lets you publish social media posts directly from Market Trak to your Facebook Page and Instagram account.
-
Go to Integrations (navigate to
/integrations) -
Click Connect next to Facebook
-
Log in to Facebook and select the Page you want to connect
-
Grant the required permissions
Once connected, you can create, schedule, and publish posts without leaving Market Trak. See the full guide at Facebook & Instagram.
6. Add your Facebook Pixel (optional)
If you run Facebook or Instagram ads, adding your Facebook Pixel lets you retarget people who view your reports. This means you can show ads to homeowners who have already engaged with your market data - a very warm audience.
-
Go to Workspace Settings > Tracking & Analytics
-
Paste your Facebook Pixel ID (a 15-16 digit number from Meta Events Manager)
-
Click Update Tracking Pixels
If you do not have a Pixel yet, you can create one in Meta Events Manager - Facebook has a step-by-step guide to help you set one up. You do not need to install any code on your website; Market Trak handles it on your reports automatically.
For the full setup details, see Tracking & Analytics.
7. Set up your Property Feed
The Property Feed monitors your website or CRM for new listings and automatically creates social media posts for each one. It is one of the most powerful time-saving features in Market Trak.
-
Go to Social Media > Property Feed
-
Enter your website URL
-
We will automatically detect your feed
-
Configure auto-approve settings per channel
The feed runs every 2 hours and costs 5 credits per auto-generated post. See the full setup guide at Property Feed.
8. Explore the AI Assistant
The AI Assistant can write social media posts, draft emails, answer questions about your local market, and much more. Open it from the sidebar and try asking it to create a post about your area.
If you have connected a CRM, the assistant can also search your property data and pull listing details directly into posts.
See AI Assistant Overview to learn what it can do.
What's next?
You are all set up. Here are some good next steps:
-
Read the Content Strategy Guide to learn what to post, how often, and why
-
Generate your first report for a local postcode
-
Install the app on your phone or desktop for quick access